Double suction pump
Compatible models: myCobot 280, myPalletizer 260, mechArm 270
product icon
Specifications
| name | Double suction pump |
|---|---|
| model | myCobot_DualPump_grey |
| Material | Photosensitive resin/Nylon 7100 |
| color | white+black |
| size | Suction pump end: 63x24.5x26.7 |
| Number of suction cups | 2 |
| Suction cup size | diameter 20mm |
| absorb weight | 150g |
| Power source equipment | Suction box |
| service life | one year |
| a fixed way | Lego Connectors |
| control interface | I/O control |
| Use environment requirements | Temperature and pressure |
| Applicable equipment | ER myCobot Series 280, ER myPalletizer Series 260, ER mechArm Series 270, ER myBuddy Series 280 |
Suction pump: used for adsorbing objects
Introduction
Suction pump, that is, vacuum adsorption pump, has a suction nozzle with one inlet and one outlet, and one exhaust nozzle. It has the advantages of simple structure, small size, convenient use, low noise, and good self-priming ability. By controlling the suction pump kit as the end effector of the robotic arm, it performs the function of absorbing objects.
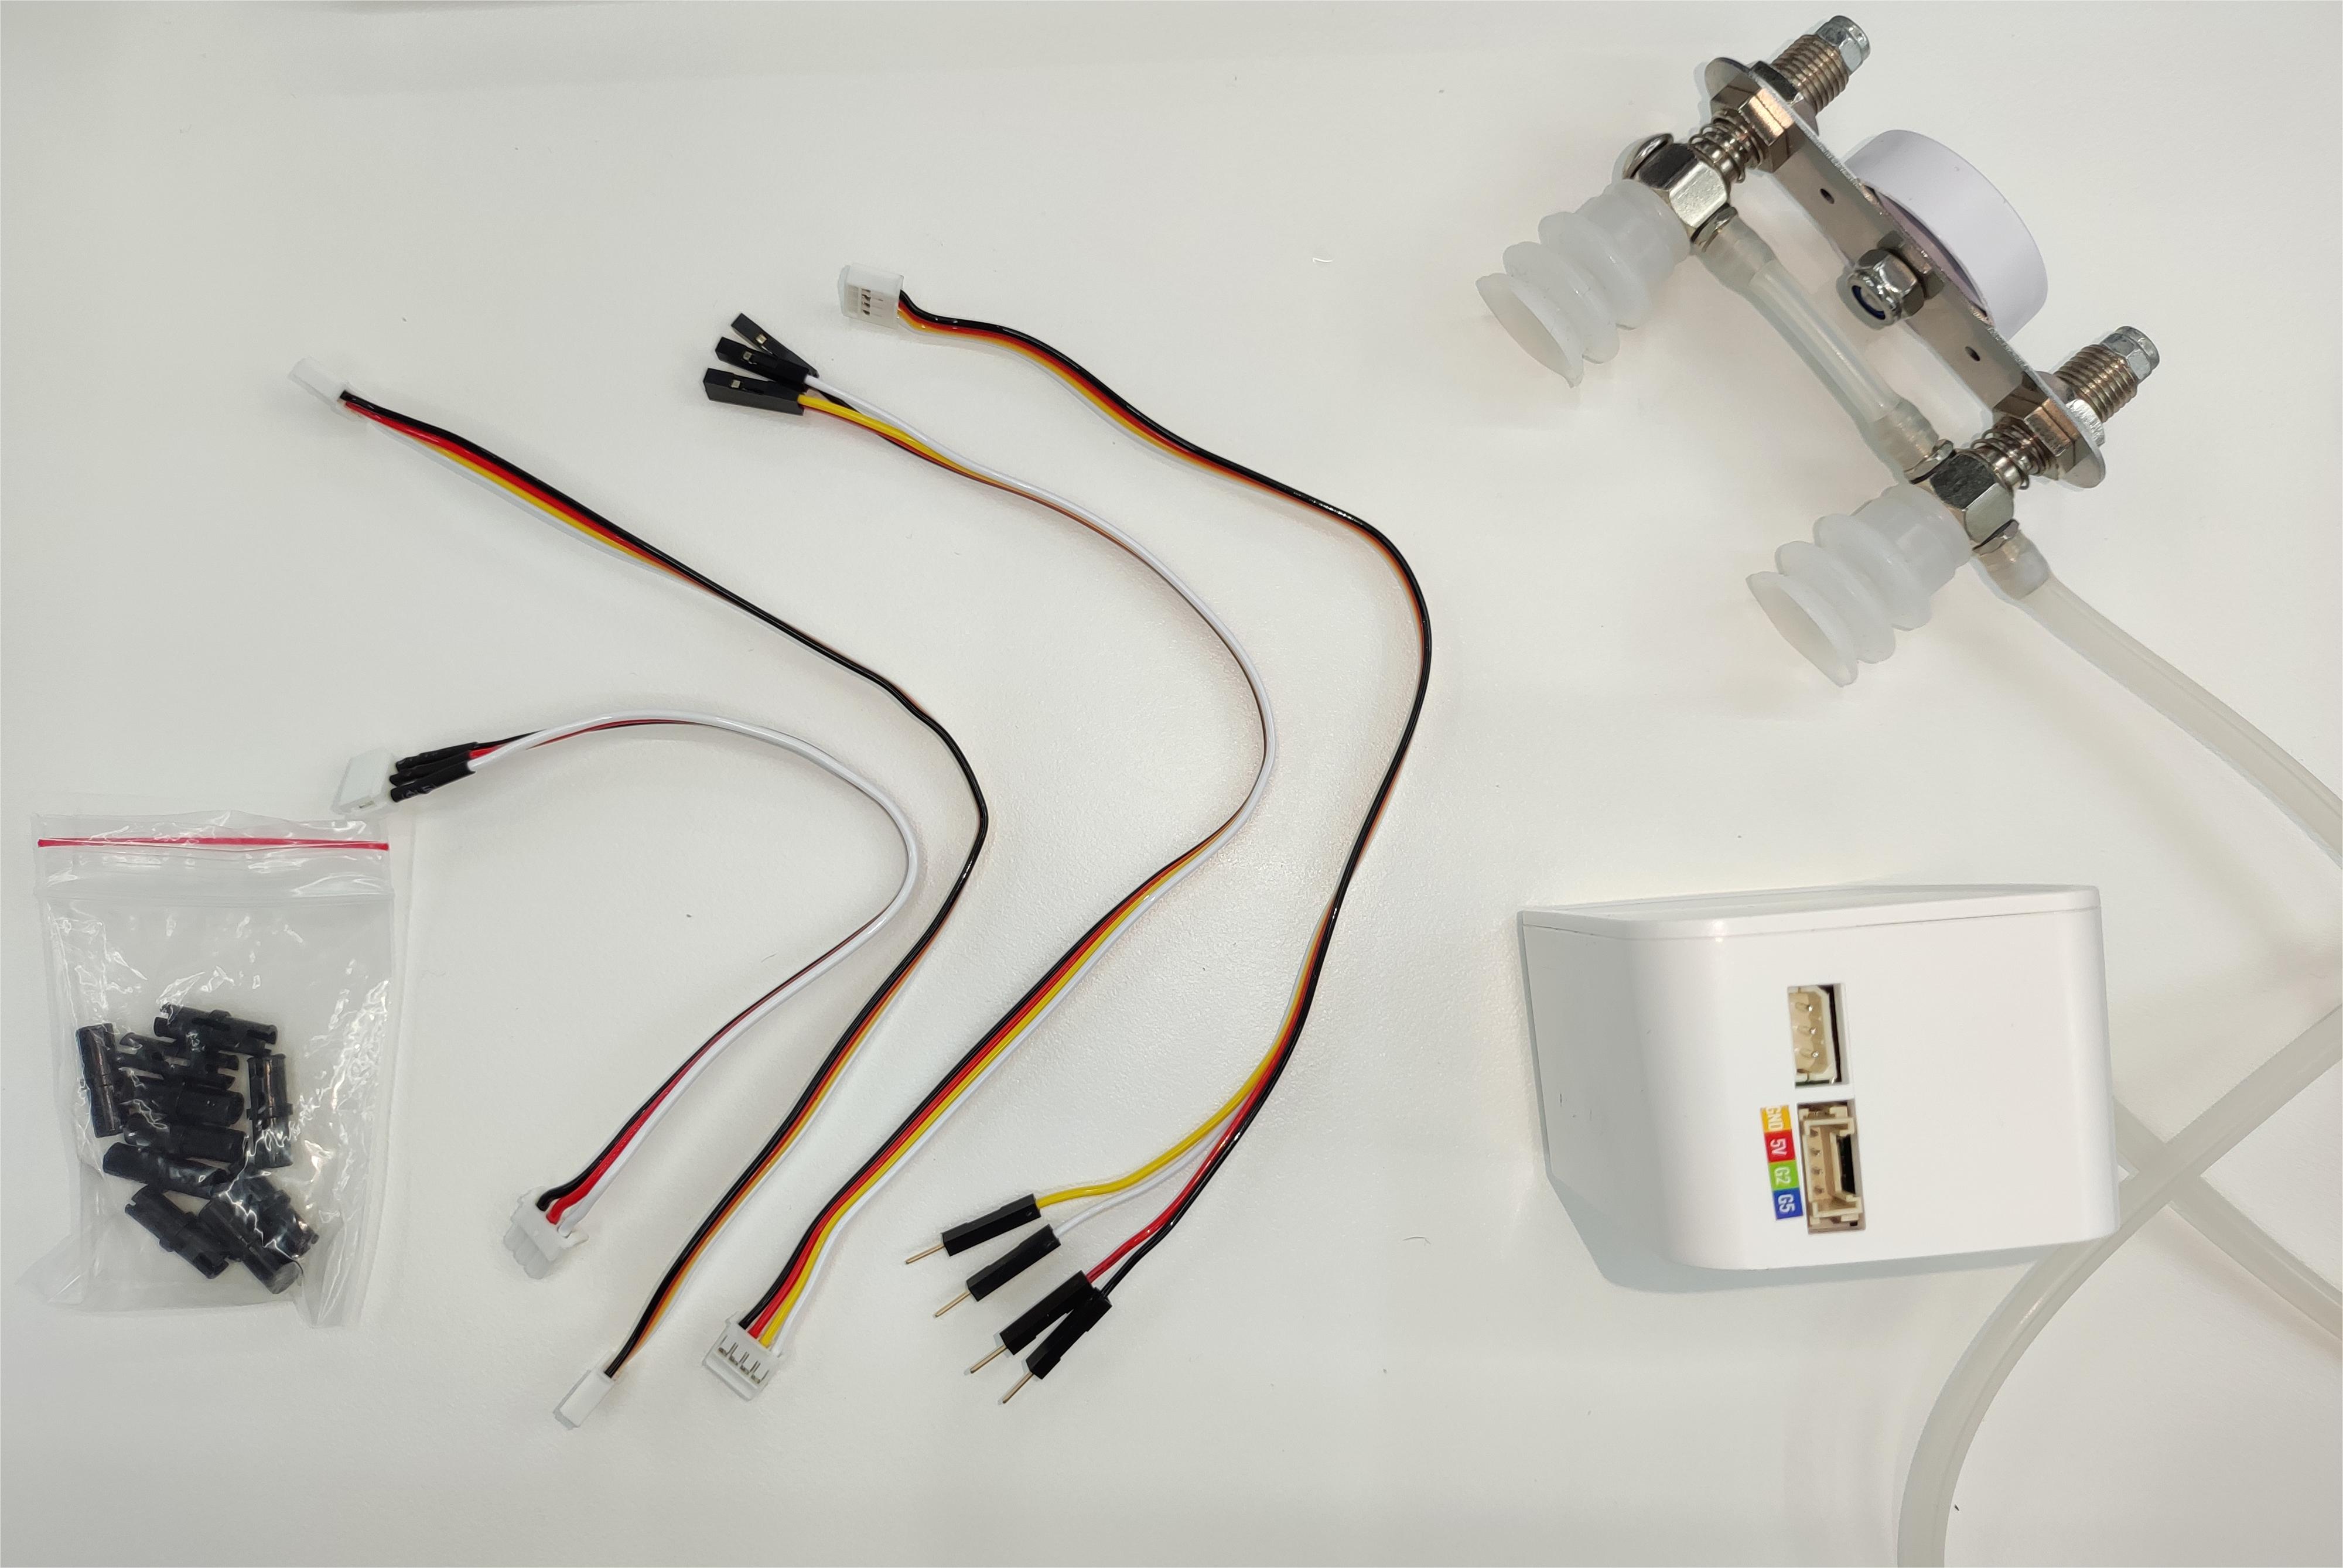
Suction pump accessories: power cord x1, DuPont line x10, one-in-two-out connection line x1, Lego tech parts x several
working principle
When absorbing items: the air pump starts to pump air to absorb the items and then stops, and there will be no air leakage for a short time.
When putting down the item: the electronic valve is activated, the air release valve is opened, and the air enters the vacuum suction cup and separates from the sucked item.
·
Applicable object
Paper/Plastic
flat smooth object
card etc.
Installation diagram (take the M5 version as an example):


Installation and use
Check that the kit is complete: LEGO connectors, Dupont cable, double-ended suction pumps.
Double head suction pump installation:
Structural Installation:
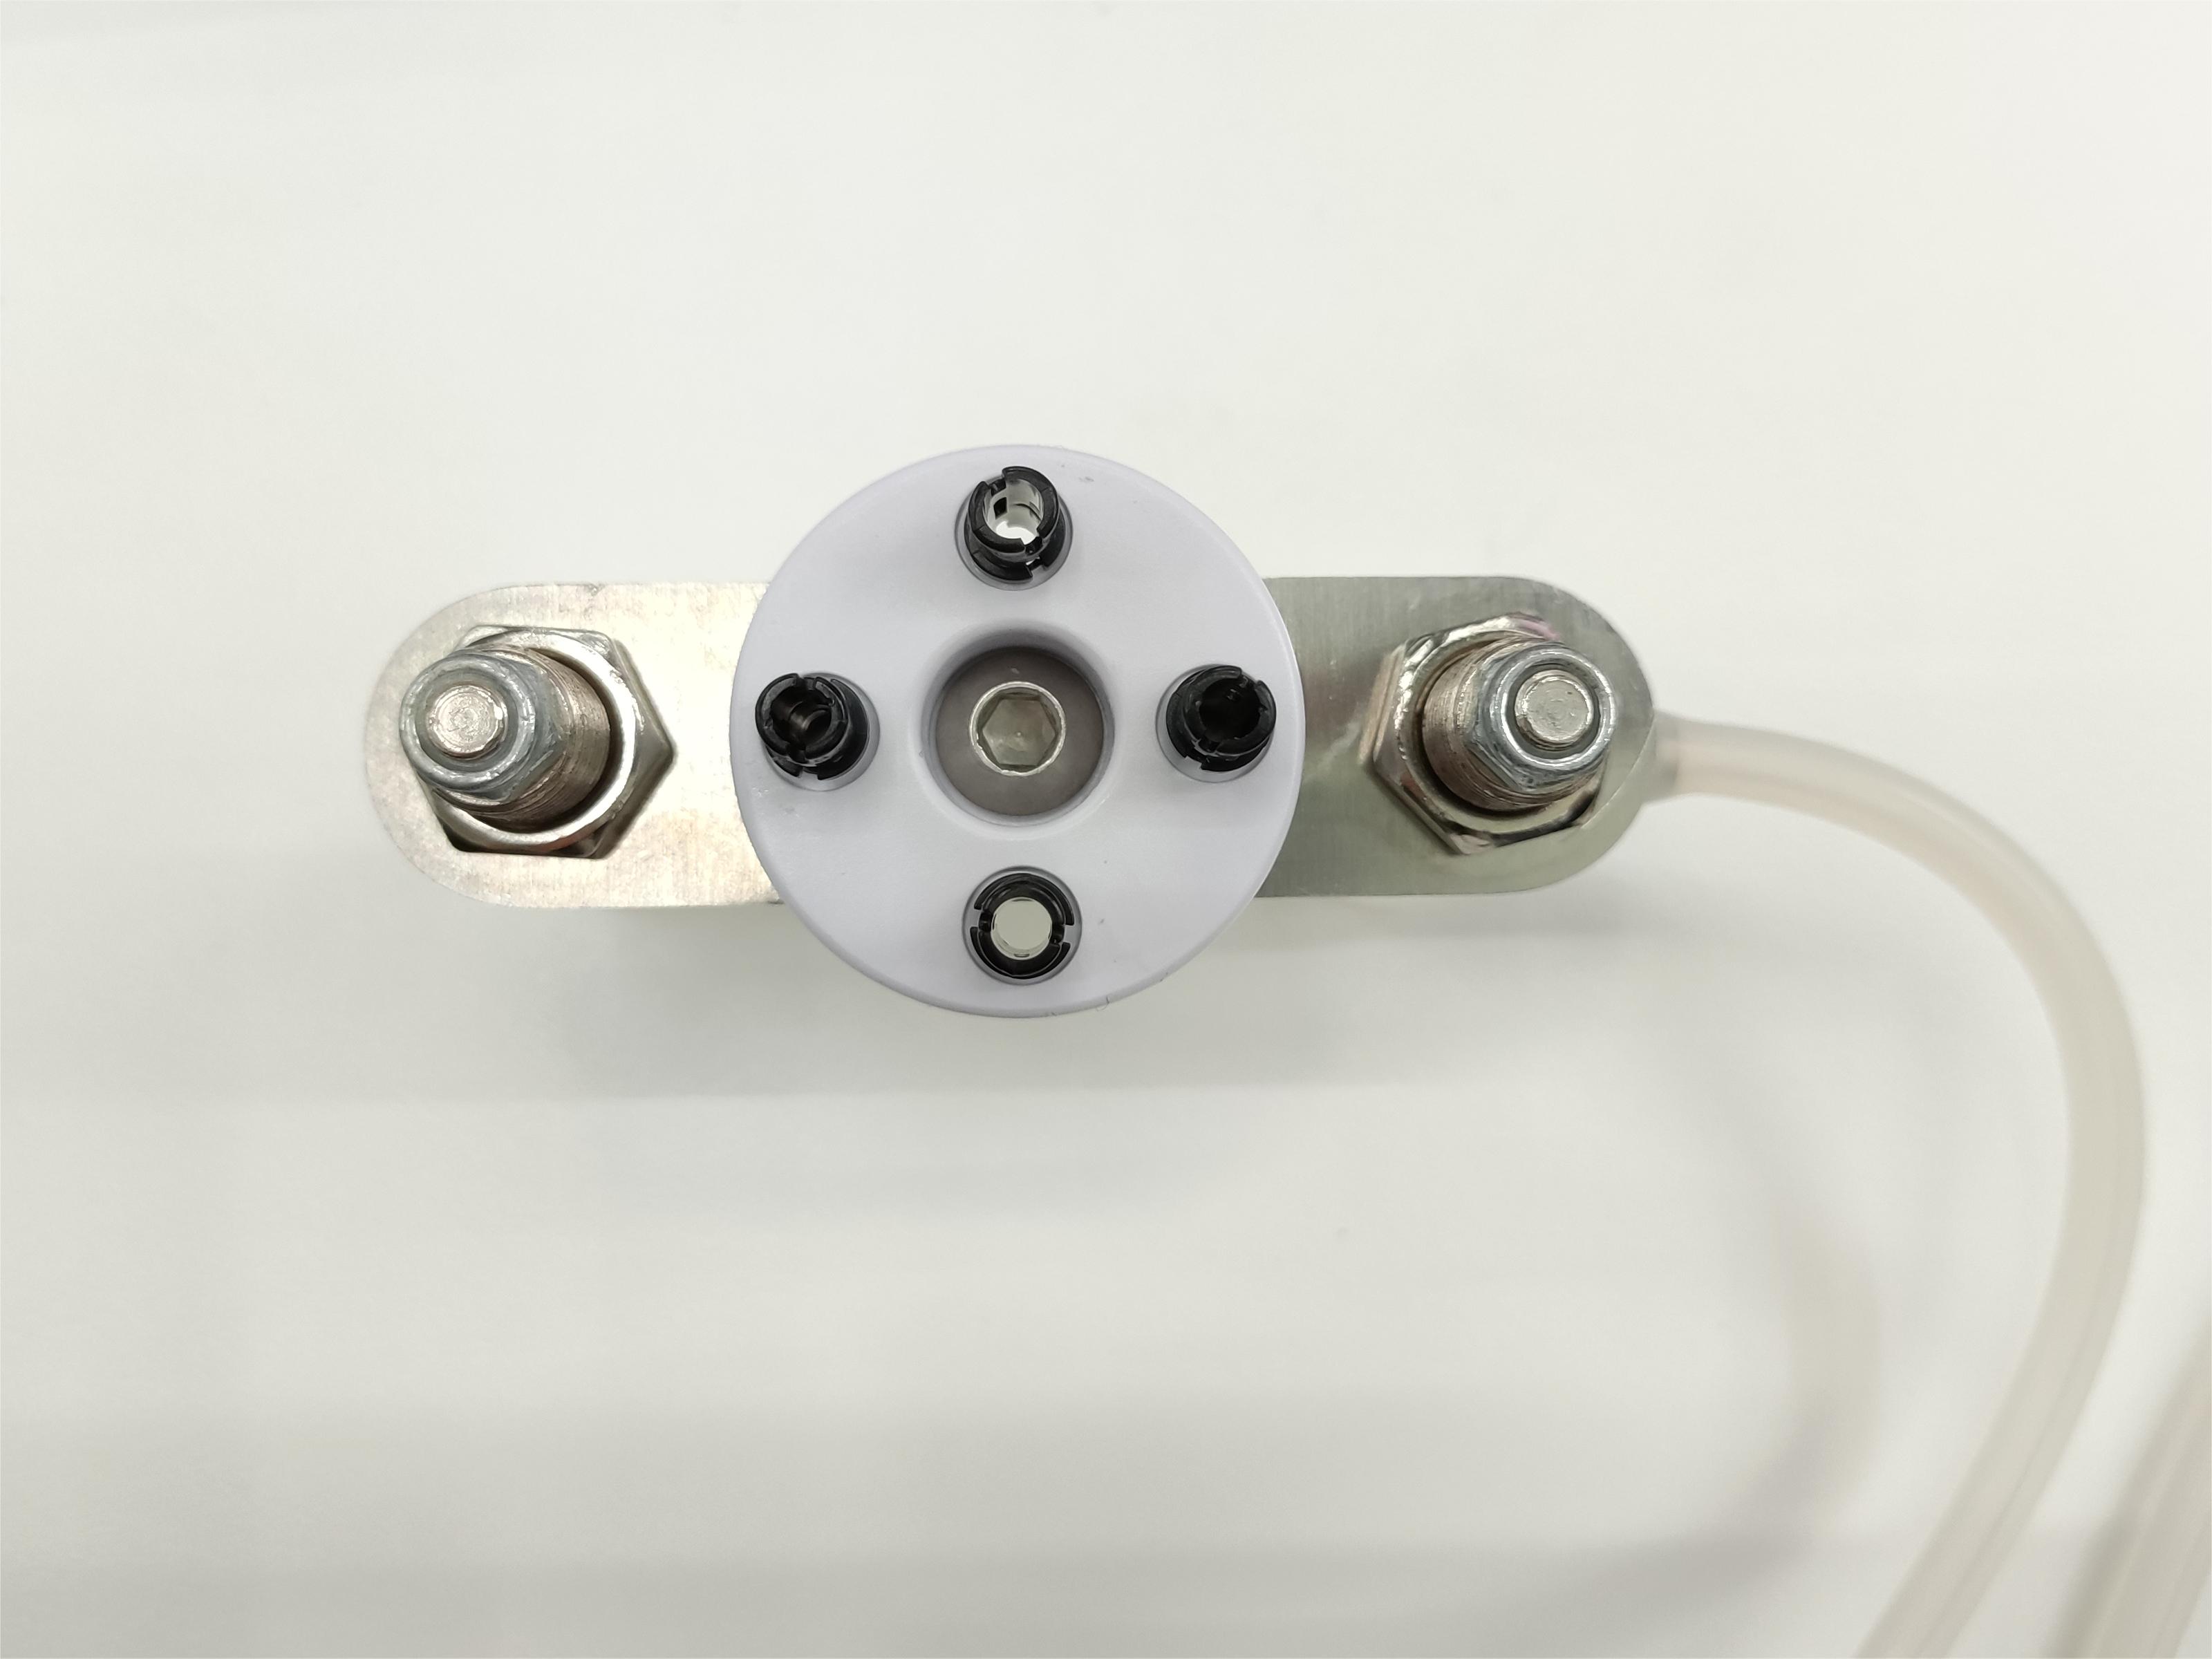
Insert the LEGO connectors into the pre-drilled sockets on the suction pump:
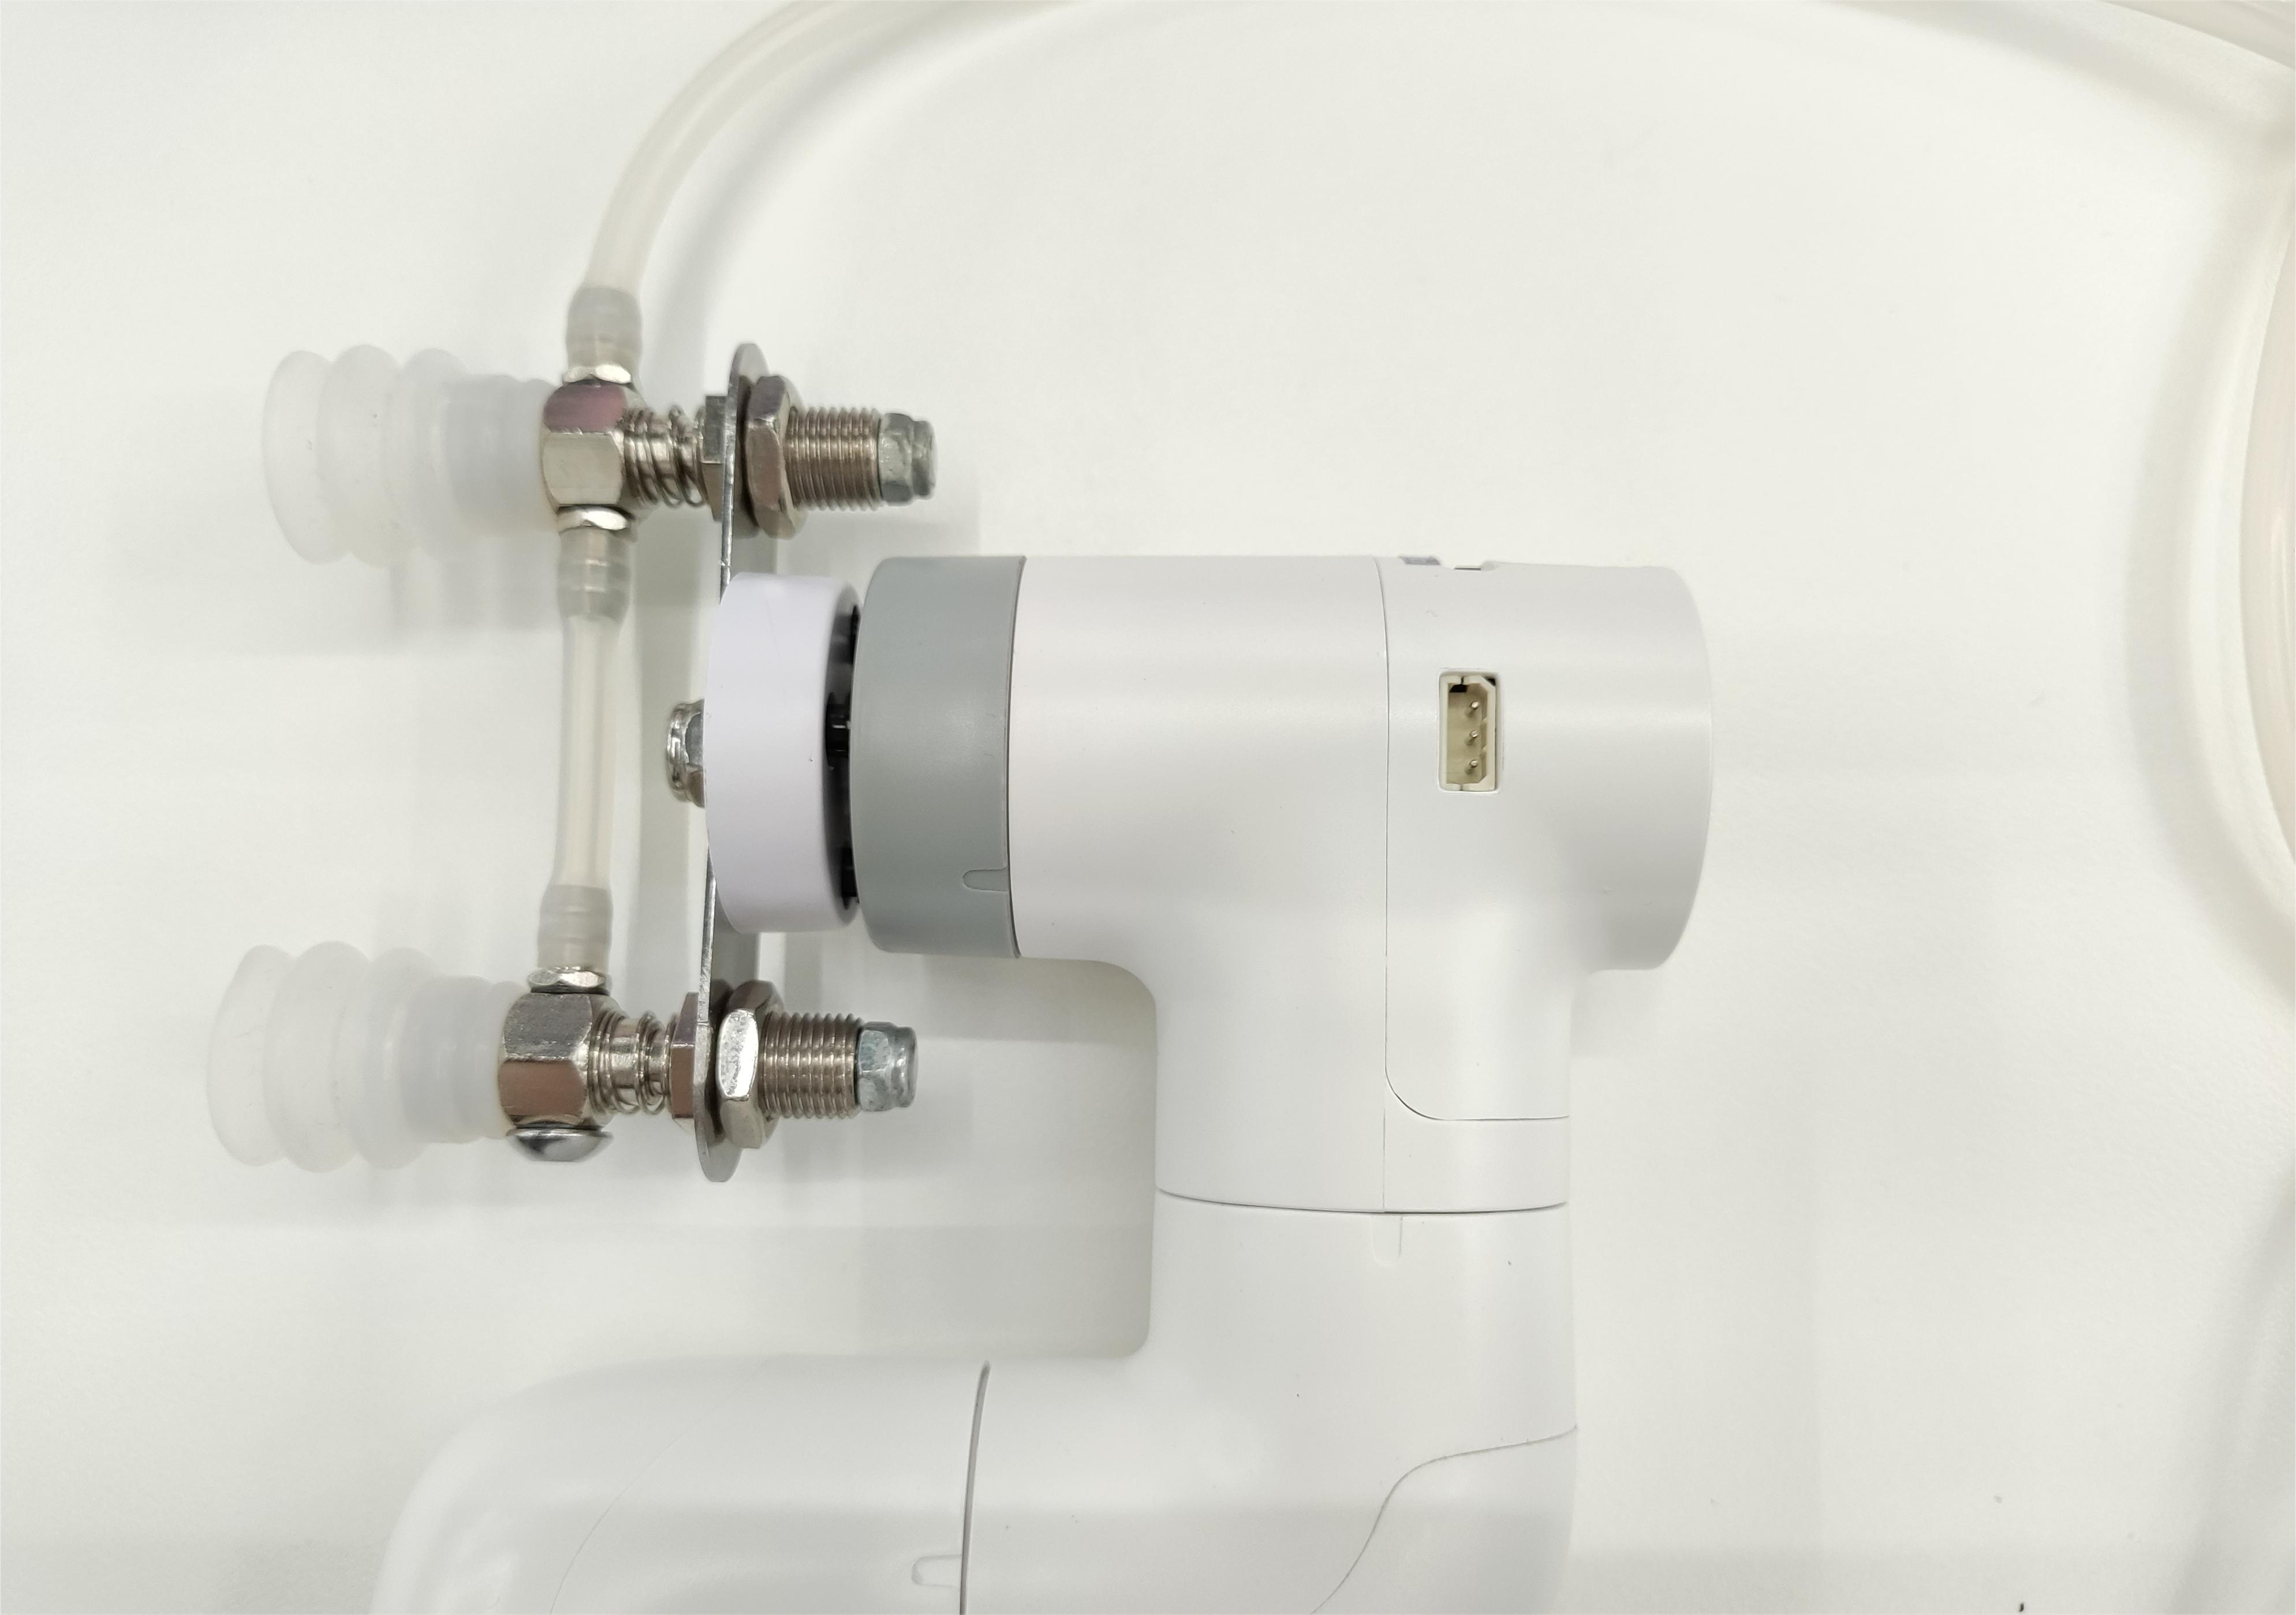
Insert the suction pump with the connector inserted against the end socket of the arm:
Electrical Connections:
Select a male-female DuPont cable and insert the female end into the socket marked with a pin on the suction pump box:
Male-Female DuPont cable:
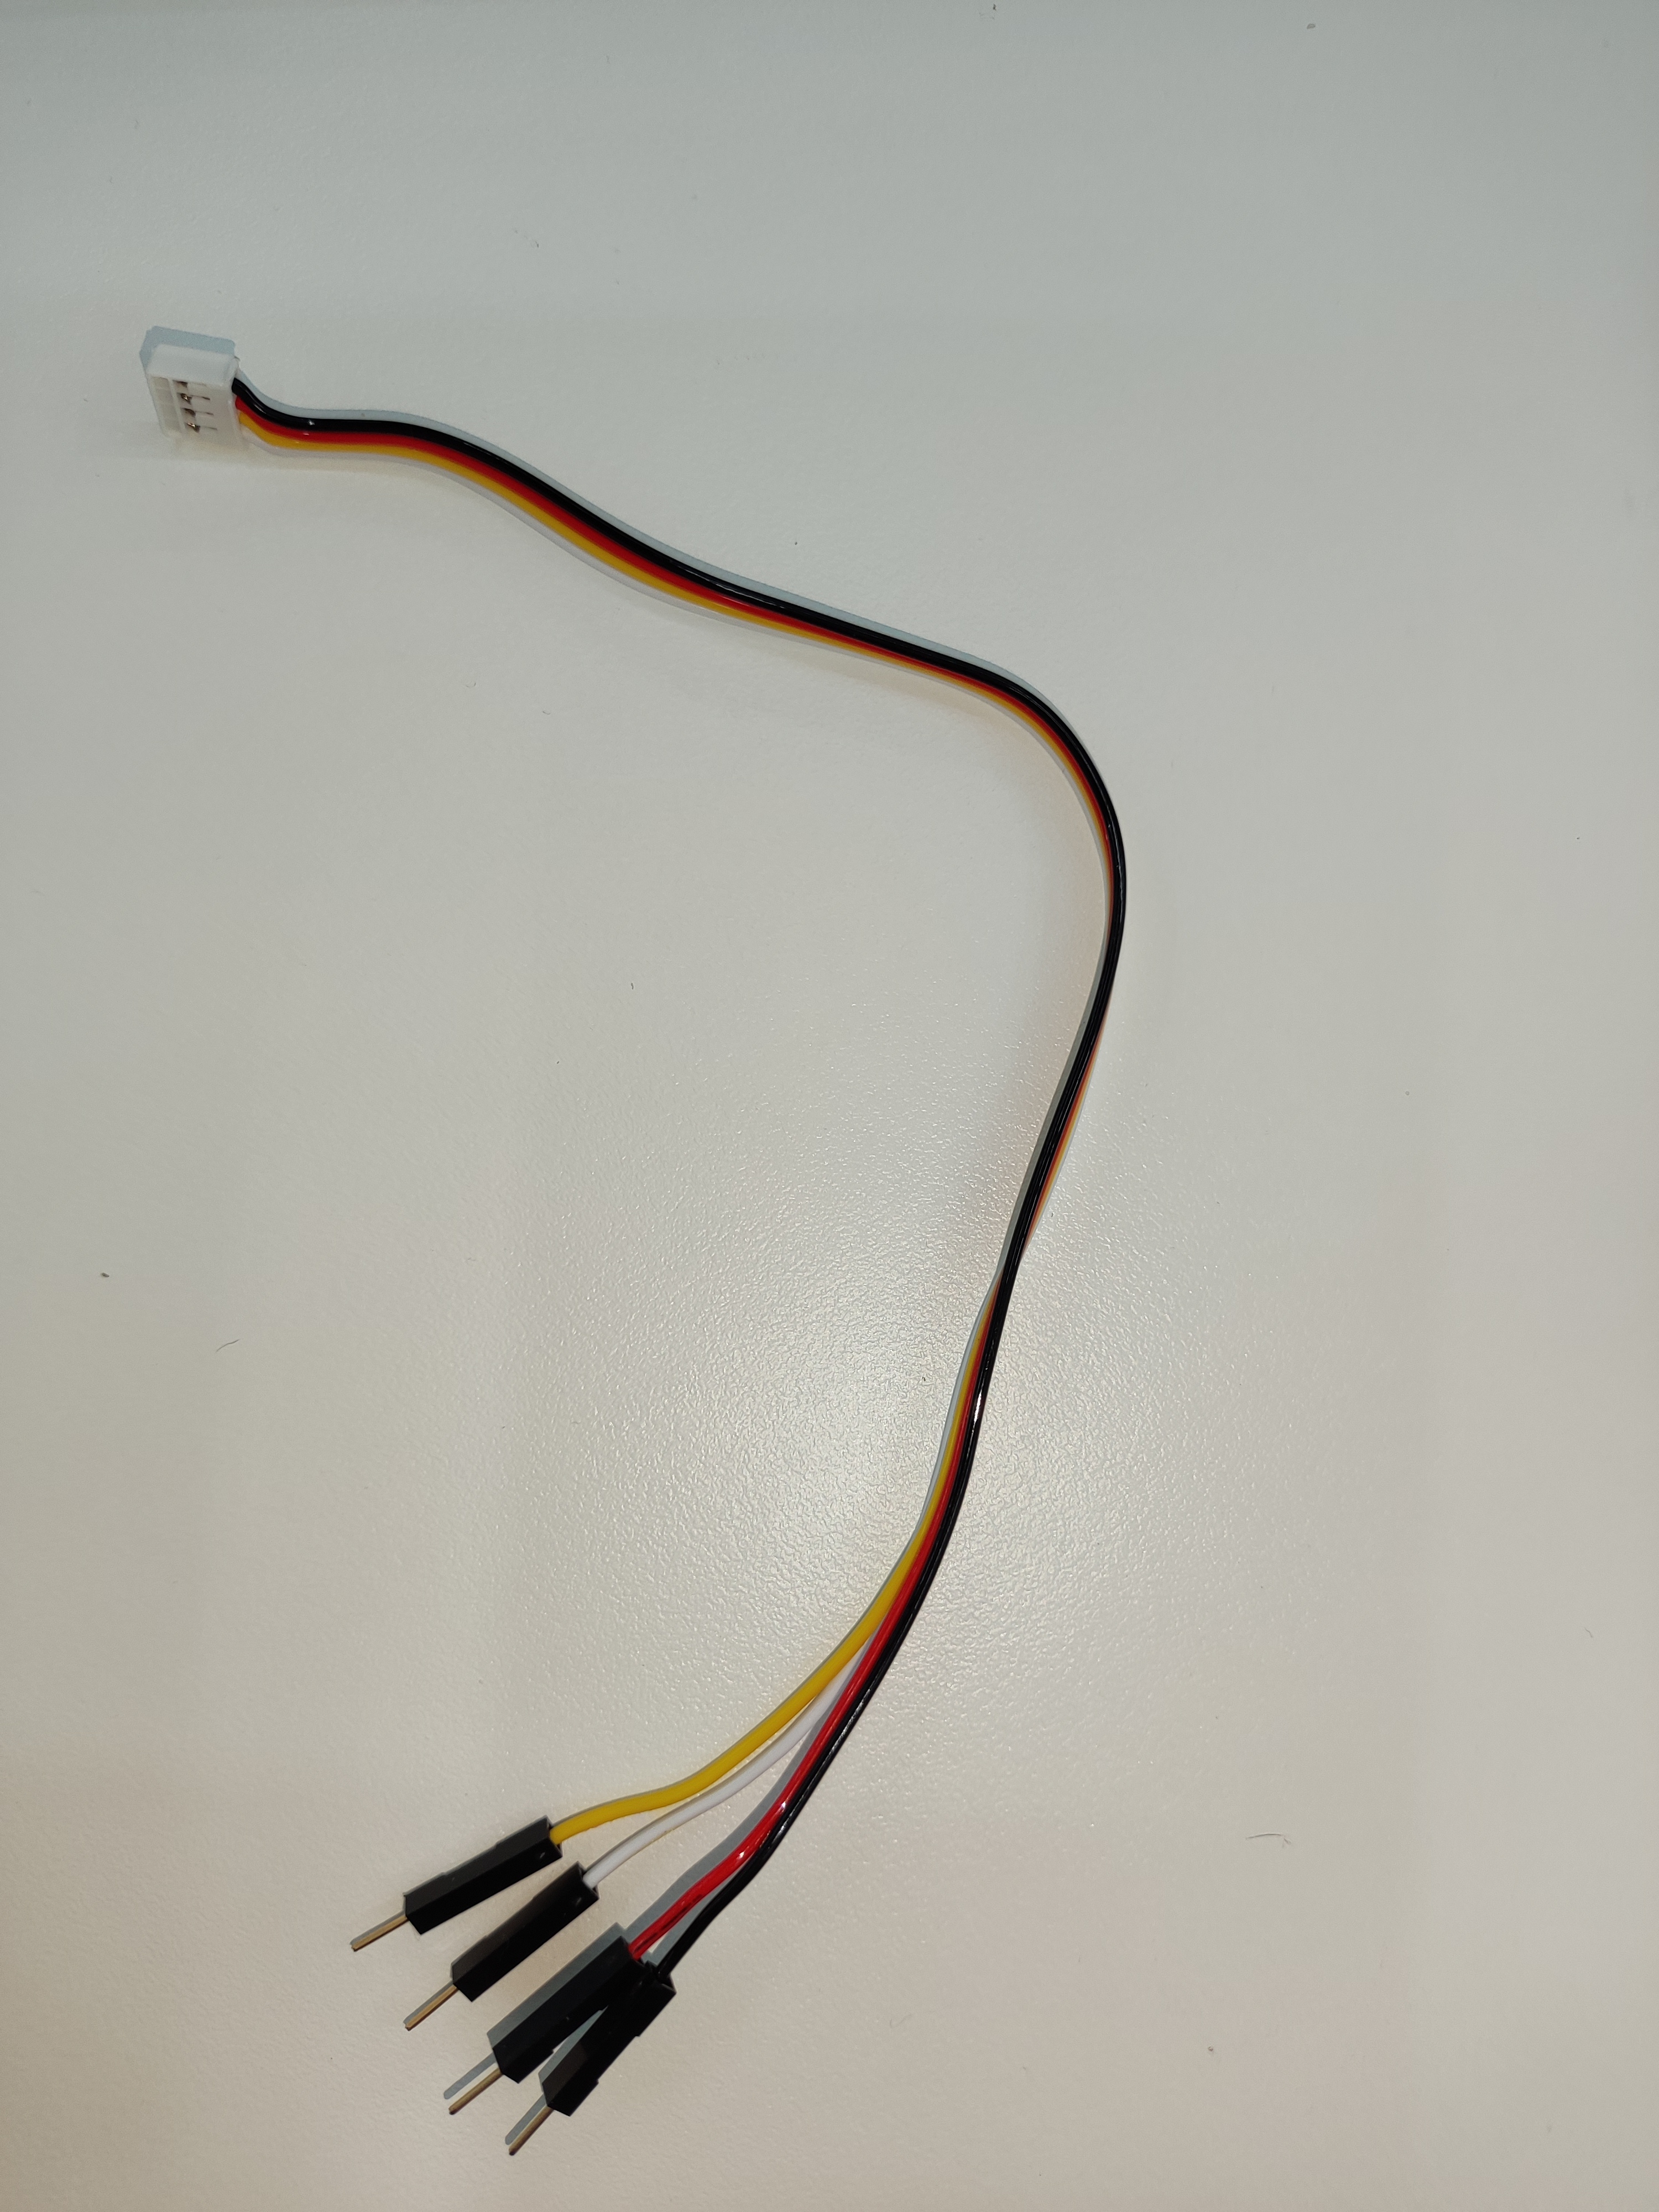 Note the correspondence between the Dupont wire colours and the pins in the diagram:
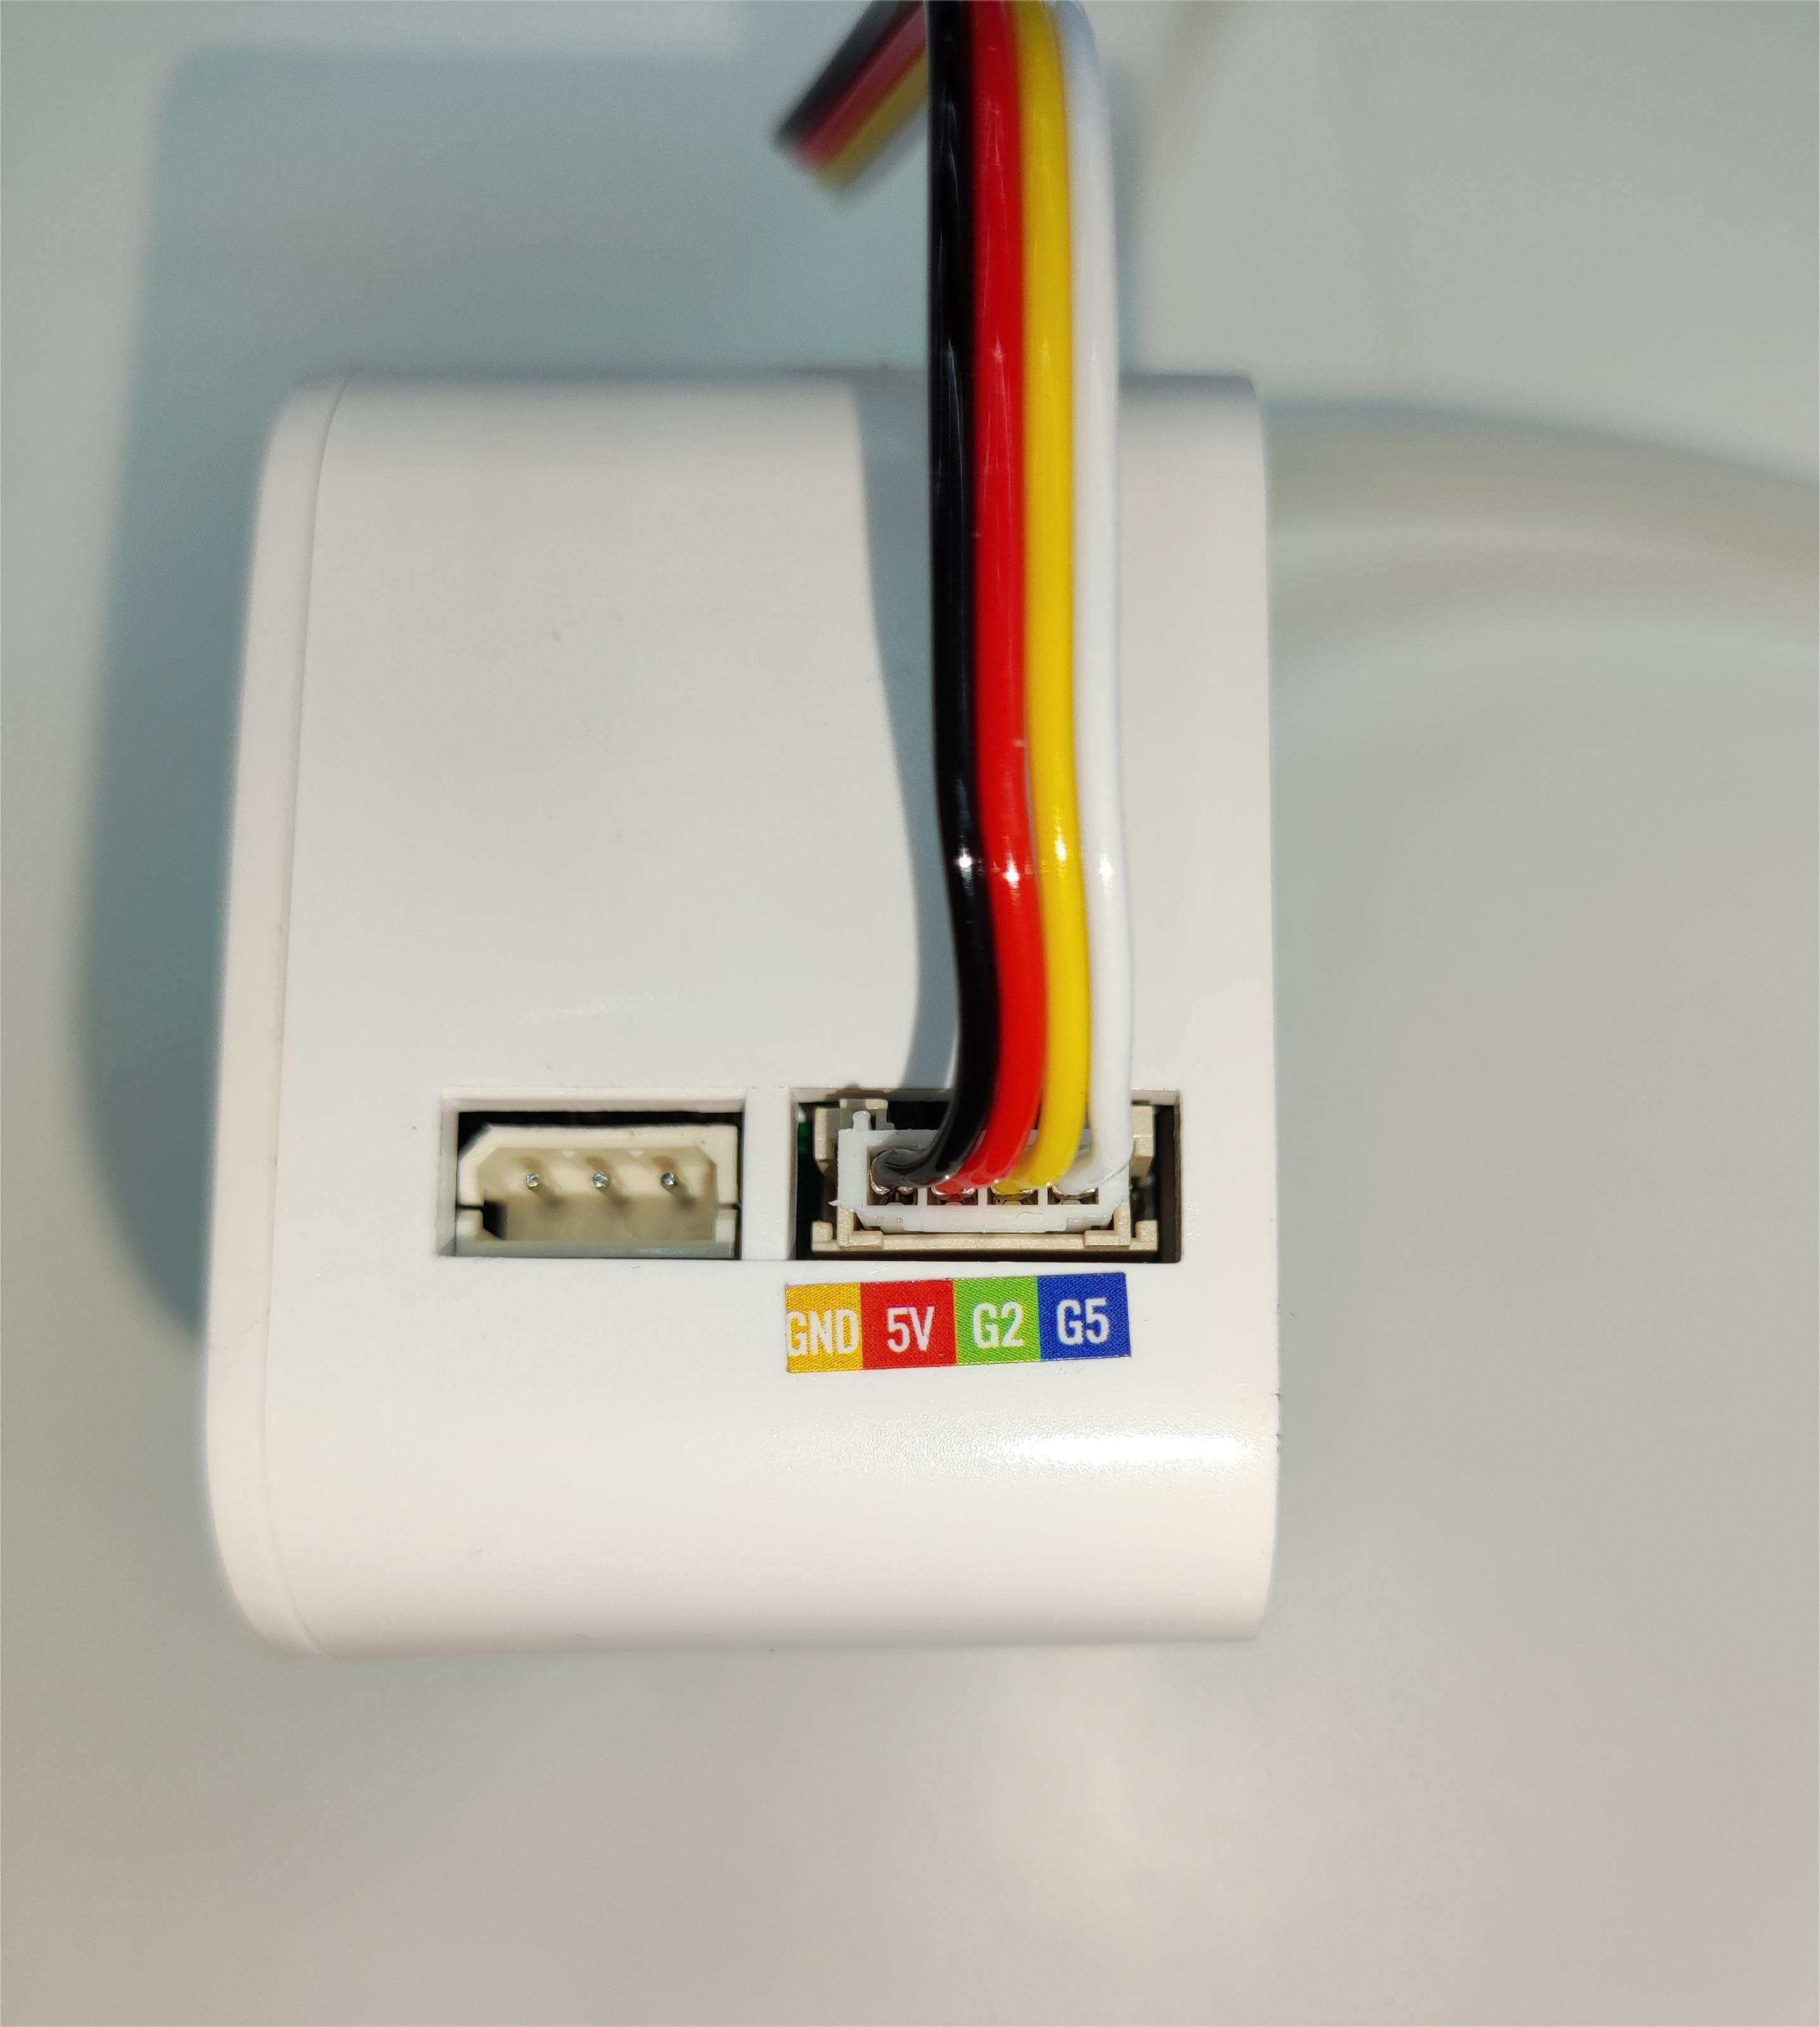
The male connector is inserted into the robot arm base pins according to the correspondence given:
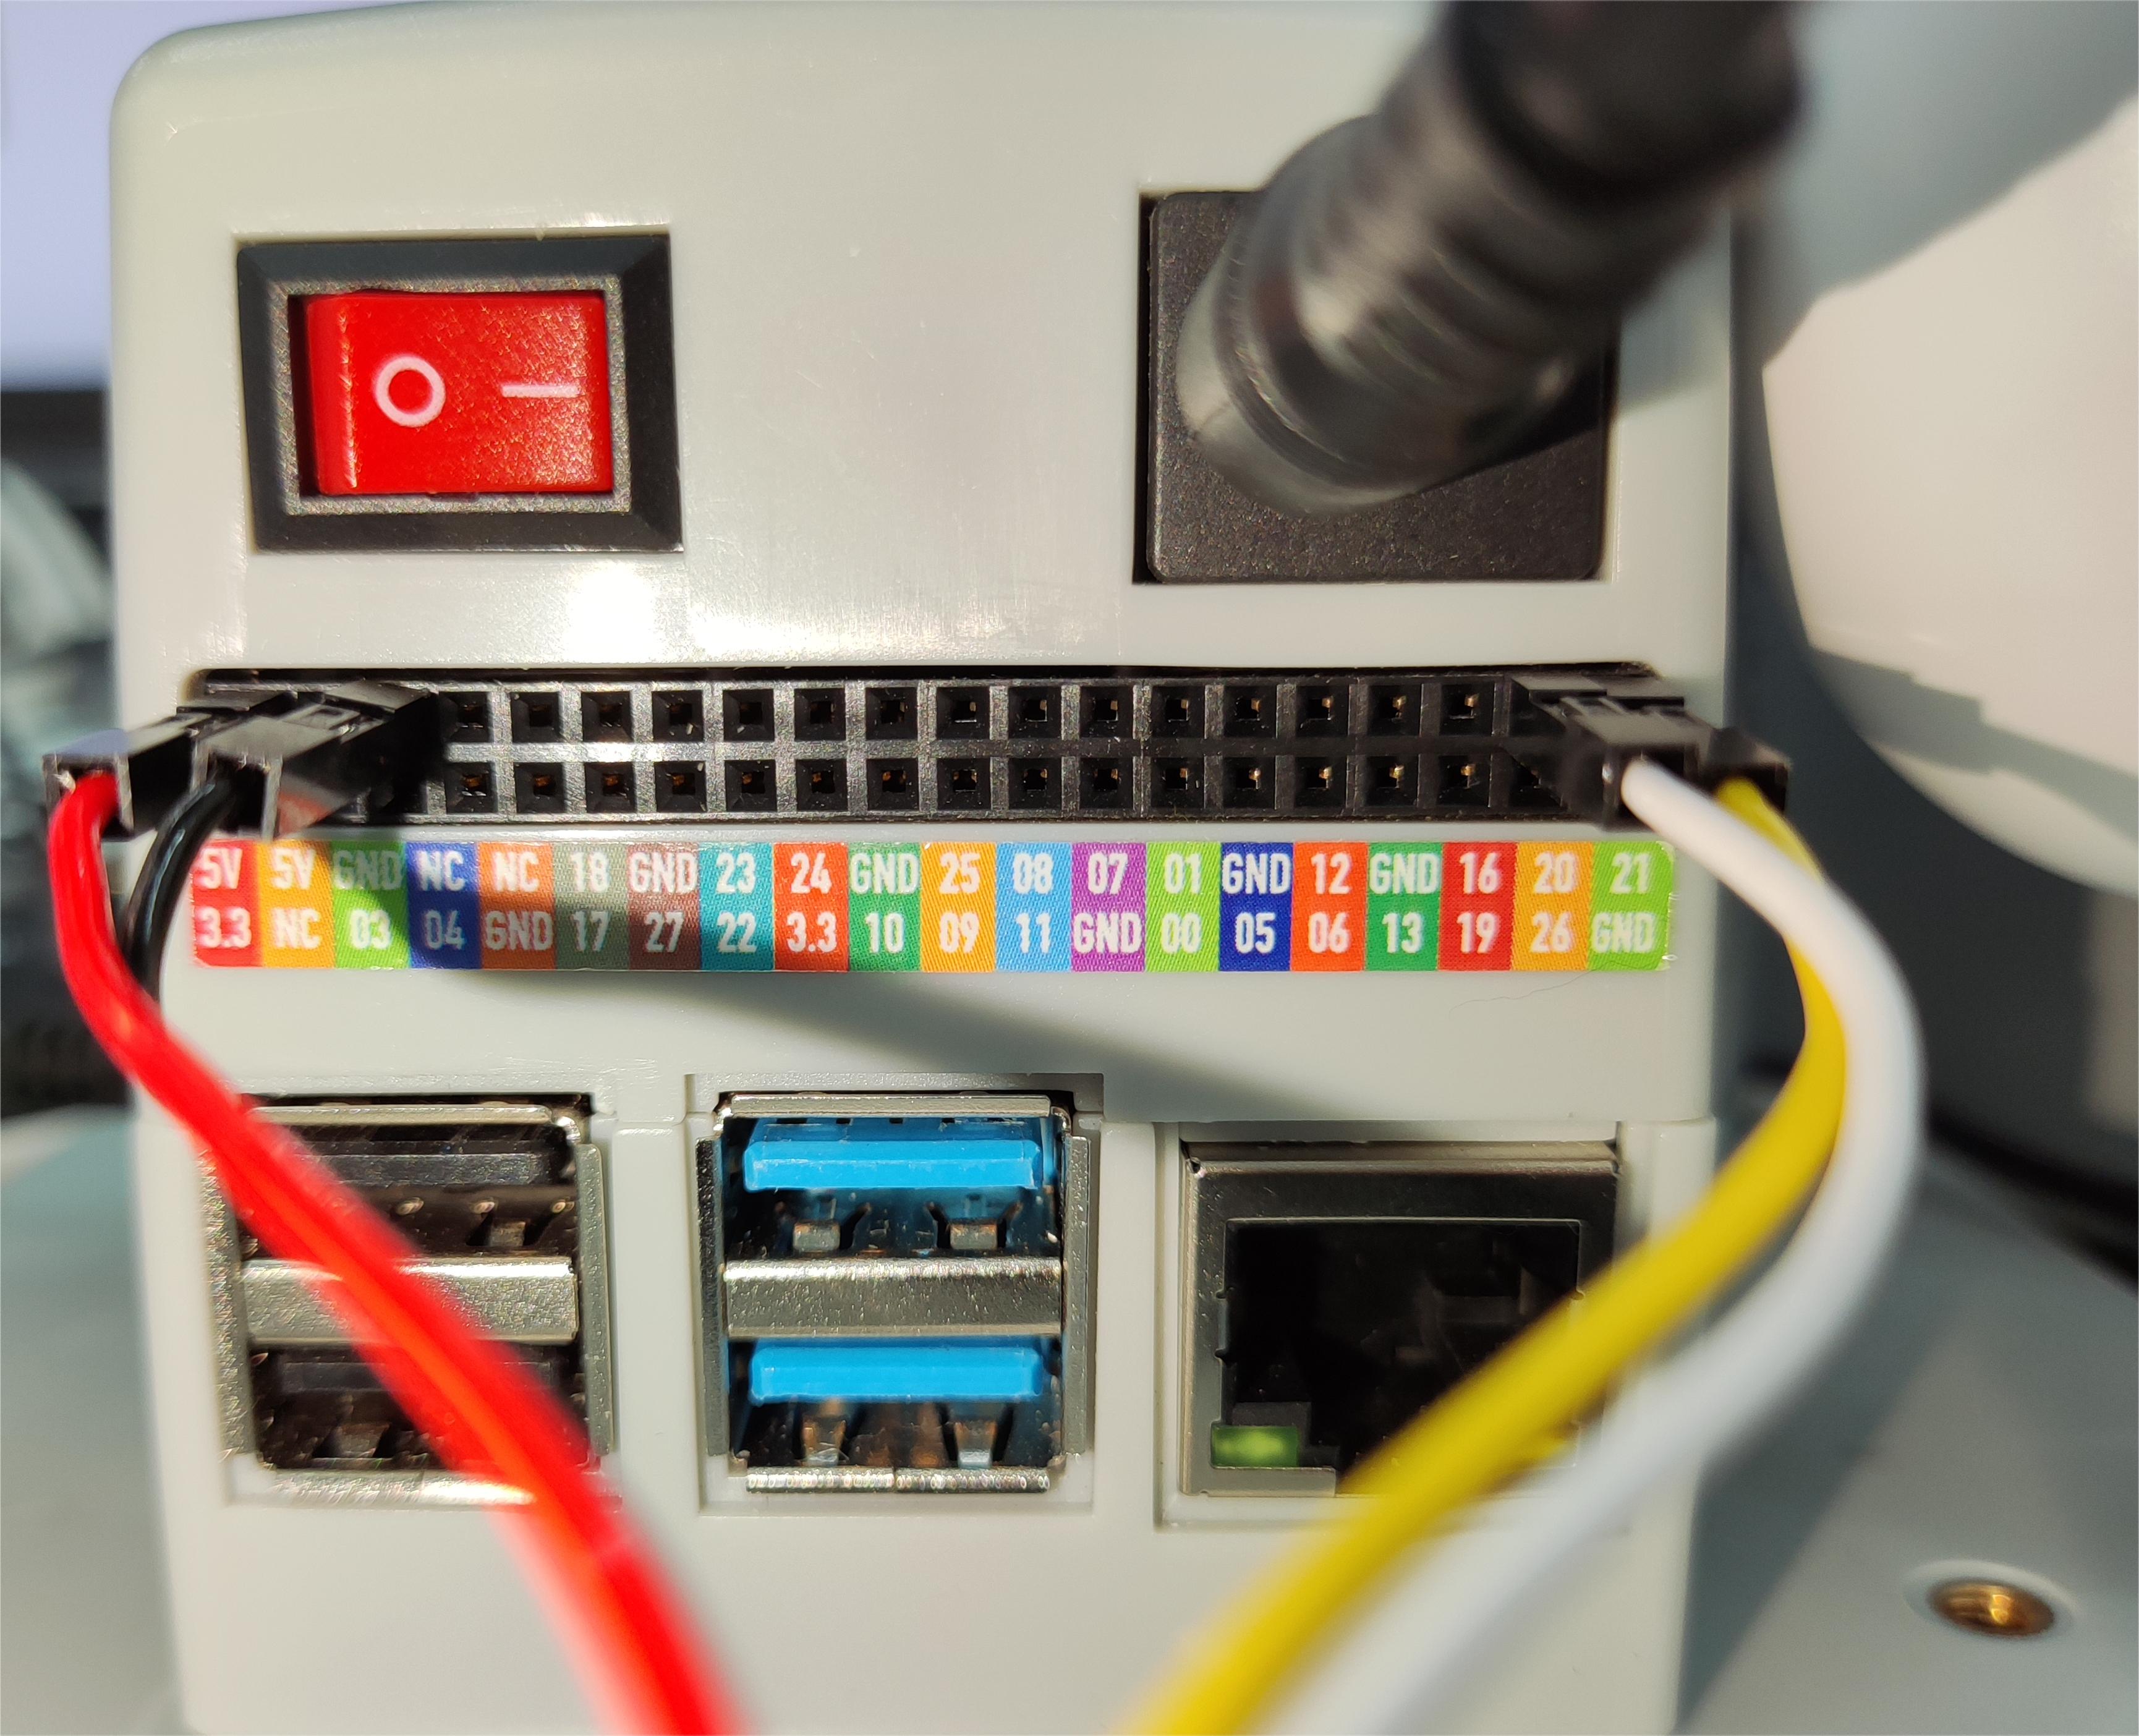
Suction pump pins on the left, robotic arm pins on the right
GND -> GND
5V -> 5V
G2 -> 21
G5 -> 20
Software driver test:
Test that the jaws are available after installation, using myBlockly. myblockly download
- After confirming that the structural and electrical connections are complete, start the robot arm and open the myblockly software when the graphical interface appears.
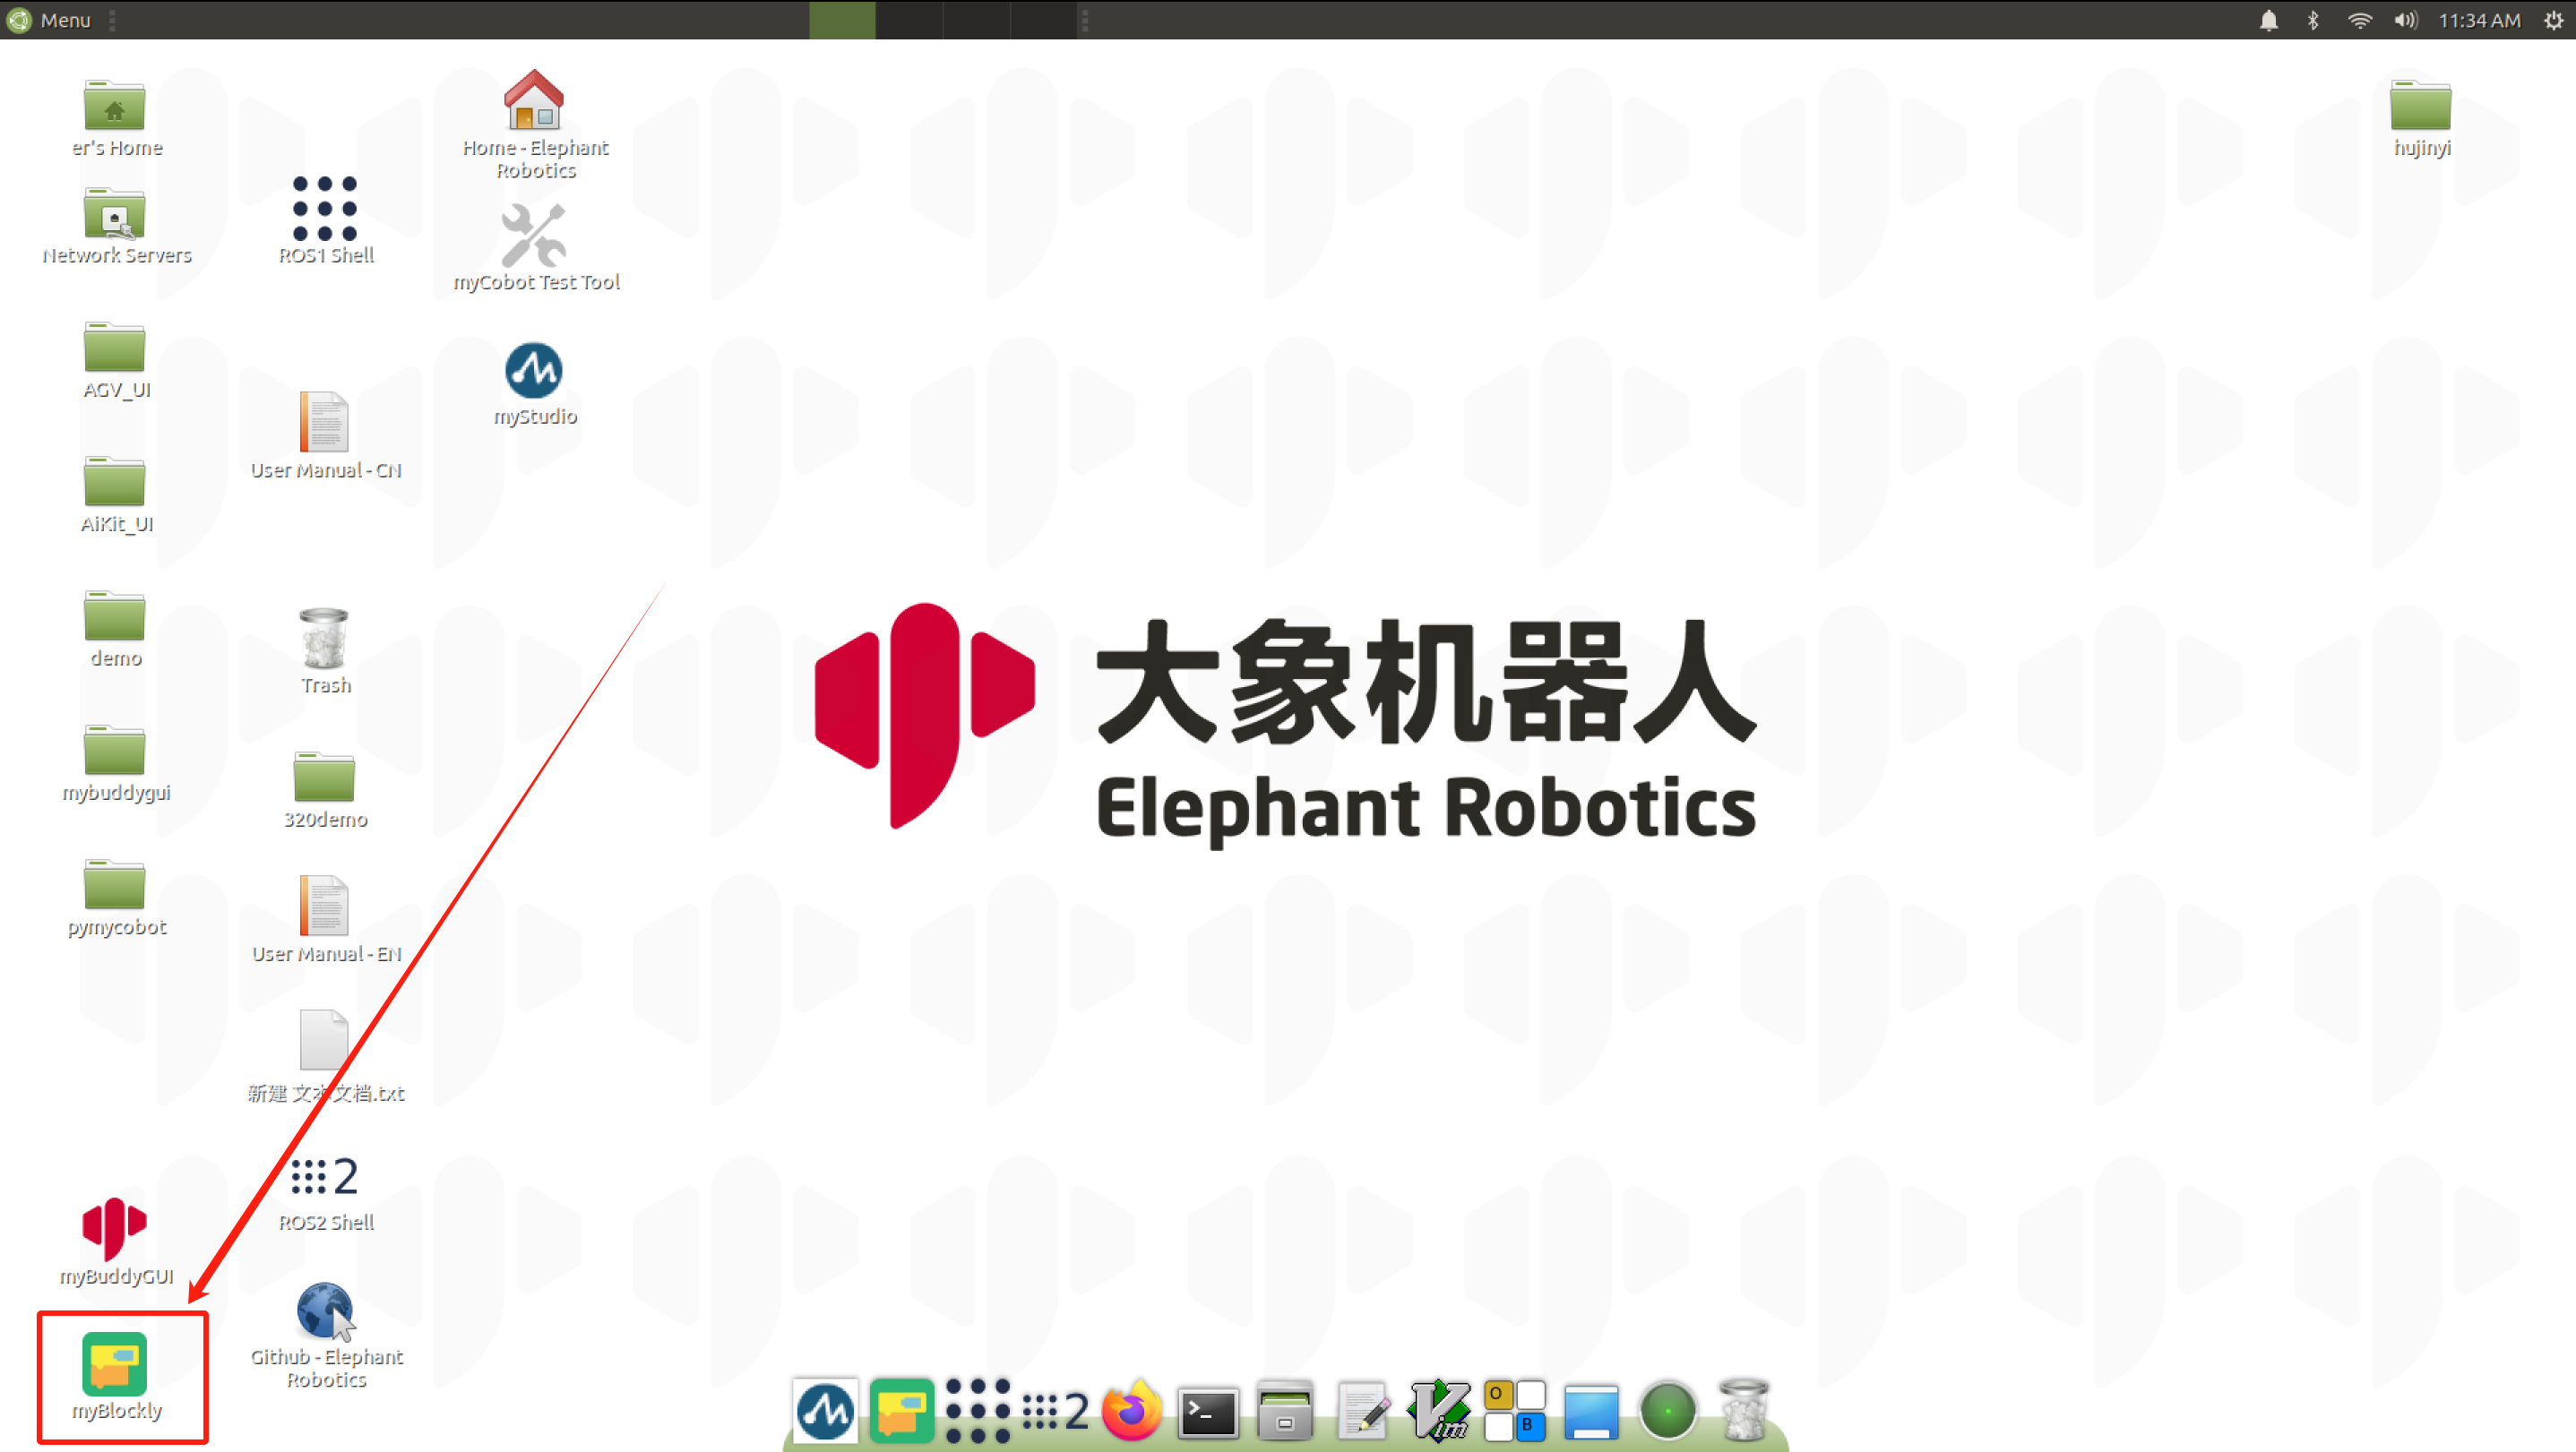
- Modify the baud rate to 1000000

- Find
Raspi-GPIOin the list on the left and select theSetup Modemodule.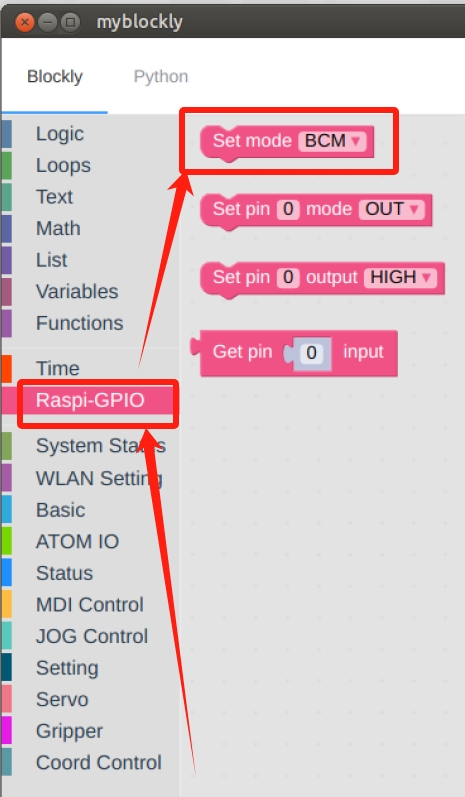
- Drag the module to connect under `Initialise mycobot module' and select BCM mode.
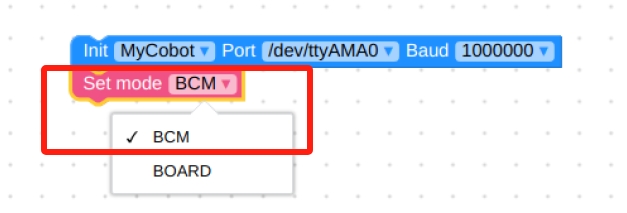
- In
Time, selectSleepmodule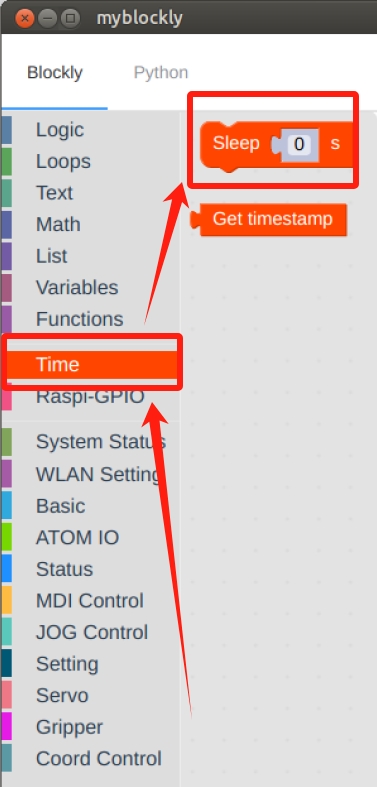
- Set the time to
1 secondin order to give a buffer time.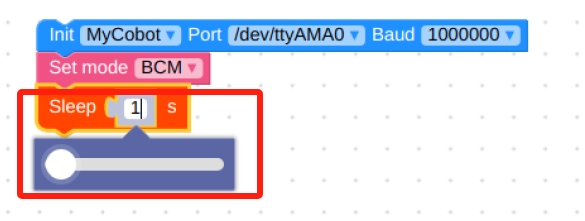
- Selection of the
Set Pin Modemodule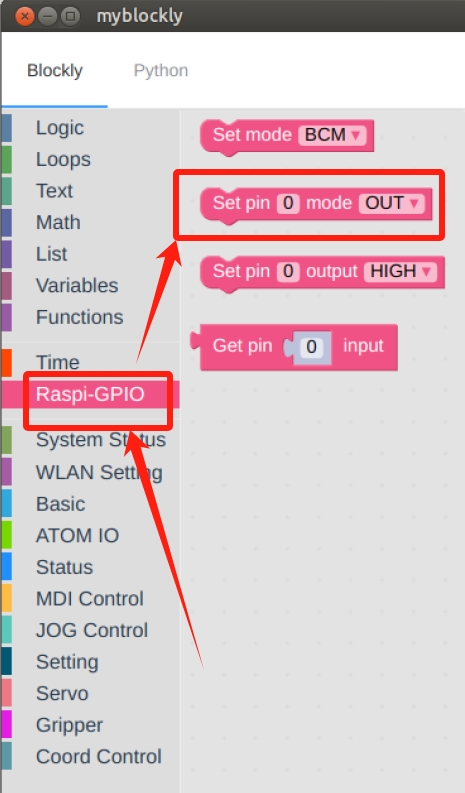
- Setting pin
20toOUT, i.e. output mode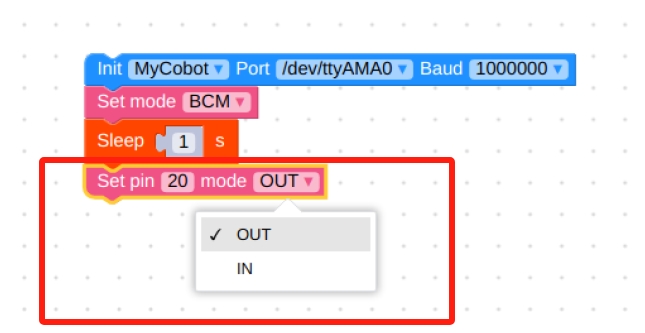
- Selection of the
Set Pin Outmodule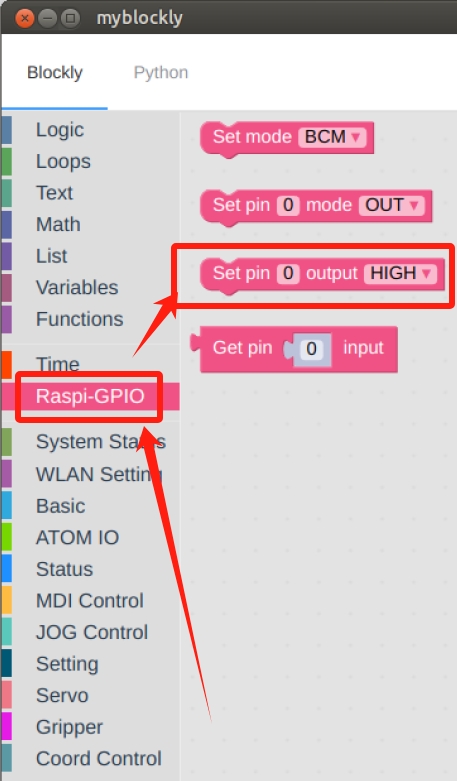
- Set pin
20output toLOW, suction pump operates at low level.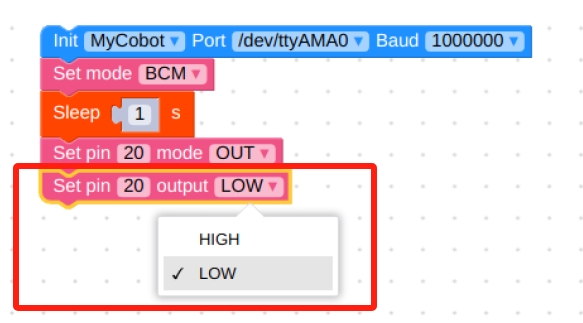
- Select the
Sleepmodule and set the time to2 secondsto allow time for the jaws to move.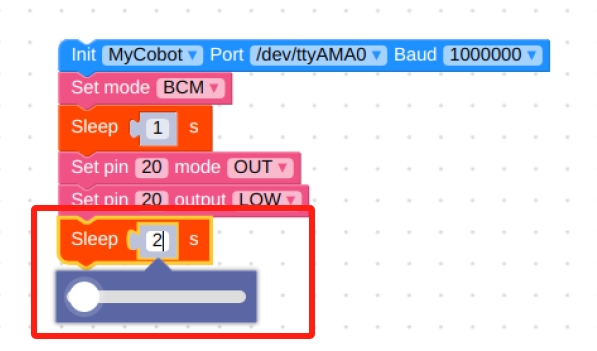
- Set the output of pin
20toHIGH, at which point the suction pump will stop working.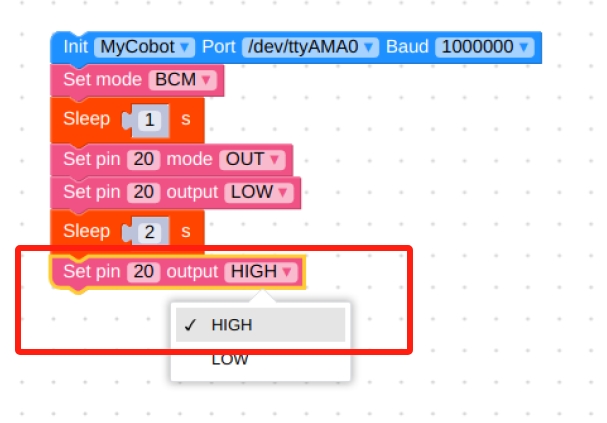
- The final result is as follows, click on the green Run button in the upper right corner to run it.
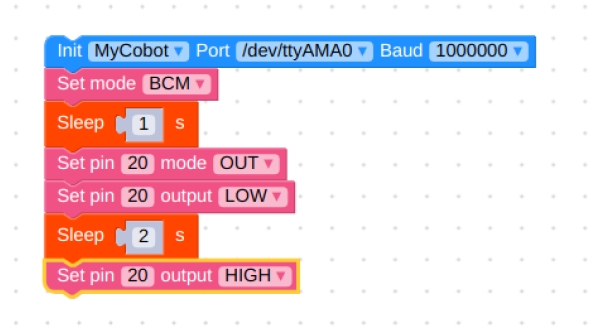
You can see that the suction pump is on, it runs for 2 seconds and then stops.
The second time you run the pump, it will saythis channel is already in use, continuing anyway, this is a normal phenomenon, the python development section will explain how to avoid it.
- After confirming that the structural and electrical connections are complete, start the robot arm and open the myblockly software when the graphical interface appears.
Programming:
Programming the suction pump using python. python download
Create a new python file:
Ctrl + Alt + TOpen the command line and type:gedit pump_double.py
The name of the file can be changed as needed
Perform function programming:
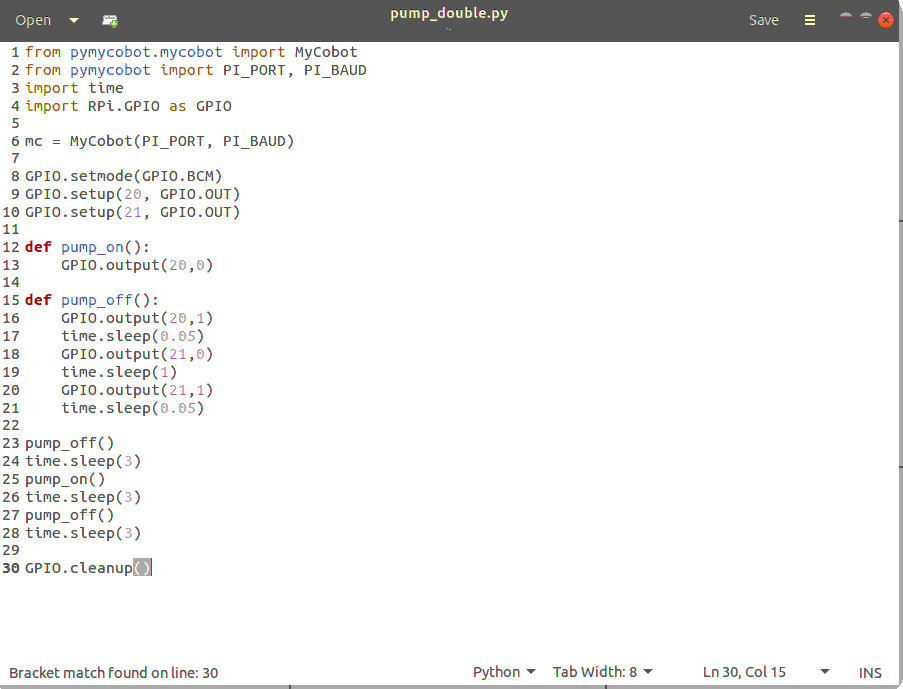
The code is as follows:
- 280-M5 Version:
from pymycobot import MyCobot280 import time # Initialise a MyCobot280 object mc = MyCobot280("COM3", 115200) # Start the suction pump def pump_on(). # open the solenoid valve mc.set_basic_output(5, 0) time.sleep(0.05) # Stop the suction pump def pump_off(). # Close the solenoid valve mc.set_basic_output(5, 1) time.sleep(0.05) # start the bleeder valve mc.set_basic_output(2, 0) time.sleep(1) mc.set_basic_output(2, 1) time.sleep(0.05) pump_off() time.sleep(3) pump_on() time.sleep(3) pump_off() time.sleep(3) GPIO.cleanup() # Release the pin channel- 280-Pi version:
from pymycobot import MyCobot280
from pymycobot import PI_PORT, PI_BAUD  # When using the Raspberry Pi version of mycobot, these two variables can be referenced for MyCobot280 initialisation
import time
import RPi.GPIO as GPIO

# Initialise a MyCobot280 object
mc = MyCobot280(PI_PORT, PI_BAUD)

# Initialise
GPIO.setmode(GPIO.BCM)
# Pins 20/21 control the solenoid and bleeder valve respectively
GPIO.setup(20, GPIO.OUT)
GPIO.setup(21, GPIO.OUT)

# Start the suction pump
def pump_on().
    # Open the solenoid valve
    GPIO.output(20, 0)

# Stop the suction pump
def pump_off().
    # Close the solenoid valve
    GPIO.output(20,1)
    time.sleep(0.05)
    # 打开泄气阀门
    GPIO.output(21,0)
    time.sleep(1)
    GPIO.output(21,1)
    time.sleep(0.05)

pump_off()
time.sleep(3)
pump_on()
time.sleep(3)
pump_off()
time.sleep(3)

GPIO.cleanup() # release pin channel
Save the file and close it, return to the command line terminal and type:
python pump_double.py
You can see that the suction pump switches on after 3 seconds and switches off after 3 seconds of continuous operation.
For more case references and running result videos, please view the use case